Create a Unique Halloween Face Paint Chalk Makeup Look
Table of Contents
Hey there, fellow Halloween enthusiasts! As we approach the spookiest time of the year, I couldn’t be more excited to dive into the enchanting world of Halloween face paint chalk. As a seasoned face paint expert, I’ve witnessed the transformative power of chalk, turning ordinary faces into extraordinary works of art. Today, let’s embark on a journey to unleash our creativity and craft a Halloween face paint look that’s as unique as you are.
Introduction
A Brief Overview of the Popularity of Halloween Face Painting
Halloween face painting has become integral to the spooktacular festivities that mark this hauntingly delightful season. People of all ages eagerly embrace the chance to transform into ghoulish creatures, mystical beings, or beloved characters. The enchantment of Halloween lies not only in costumes but also in the artistry of face painting, which adds a captivating dimension to the celebration.
Introduce the Focus on Using Chalk for a Unique and Innovative Halloween Look
As we explore the realm of Halloween face paint chalk, we unlock a trove of possibilities, seamlessly blending traditional Halloween face paint with the versatility of chalk pigments. This not only allows for a broader spectrum of colors but also adds an artistic touch that sets your look apart from the ordinary.
From classic Halloween symbols to fang-tastic designs and eerie horror-inspired themes, chalk opens up a world of imaginative opportunities. Plus, worry not about the kiddos’ safety; we’ll cover non-toxic options to ensure a worry-free Halloween experience.
Getting Started with Halloween Face Paint Chalk
Importance of Choosing the Right Face Paint Chalk
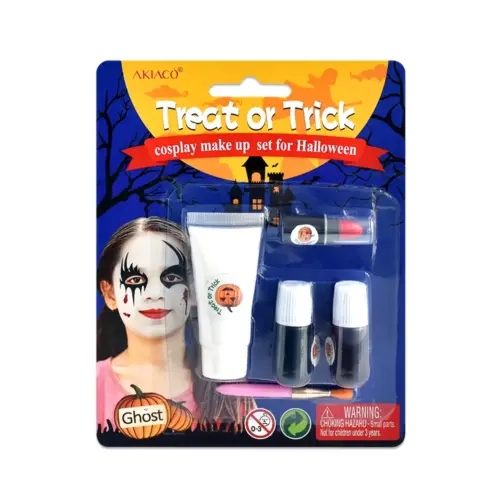
Selecting the right face paint chalk is like choosing the perfect color palette for your Halloween masterpiece. Opt for vibrant and pigmented chalks to bring your spooky visions to life. The importance lies not just in the hues but also in the quality – ensuring smooth application and durability throughout the night. So, let’s delve into the world of chalk options, from classic black and white to bold and charming colors, giving your Halloween face paint the wow factor it deserves.
Safety Considerations for Non-Toxic Kids Makeup
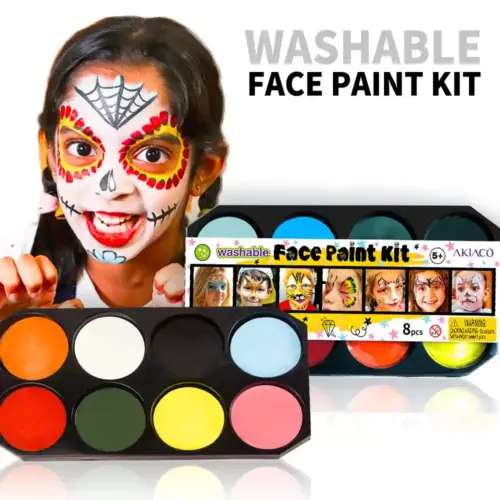
For our little trick-or-treaters, safety is paramount. We’re diving into non-toxic kids makeup, ensuring a worry-free Halloween experience. Explore Halloween face paint chalk options designed for youngsters, giving parents peace of mind. Let’s ensure the little goblins and fairies can enjoy the festivities without any concerns about harmful ingredients.
Quick Guide on Preparing the Skin for Face Painting
Before we embark on our chalky adventure, let’s ensure your canvas – your face – is ready for the artistic transformation. This quick guide covers the basics of skin preparation, from cleansing and moisturizing to creating a smooth surface for optimal chalk adherence. Because a well-prepared canvas is the key to a flawless and long-lasting Halloween face paint chalk masterpiece.

Exploring Halloween Face Paint Chalk Ideas
Easy Halloween Face Painting Ideas
Looking for a fuss-free way to spook up your Halloween look? Dive into these effortless and fun halloween face paint chalk ideas that will make you the talk of the town. Let’s explore some easy Halloween face painting options that are perfect for both kids and adults.
Classic Halloween Symbols with Chalk
The materials used in kids makeup play a pivotal role in the overall experience. Seek products crafted from safe, non-toxic materials that are gentle on delicate skin. Our guide will navigate you through the world of material selection, helping you make choices that align with your child’s well-being.
Quick and Simple Designs for Last-minute Costumes
Embrace the spirit of Halloween by incorporating classic symbols into your face paint. Think about iconic elements like bats, spiders, and witches’ hats. You can easily sketch these timeless symbols with chalk, creating a spooky yet charming look. Grab your chalk palette and let your creativity flow – it’s all about having a good time without the hassle of intricate designs.
Are you looking for more inspiration? Explore the vast realm of Halloween face paint ideas – from painted zombie pumpkins to horrifyingly cool horror face paint ideas. With non-toxic kids makeup, parents can rest easy knowing their little ones are safe while having a blast.
Summary
In conclusion, dive into the magic of Halloween face paint chalk, experiment with easy ideas, and let your imagination run wild. This Halloween, make a statement without the complexity – because sometimes, the simplest designs leave the most lasting impressions.
Fangs Face Paint Tutorial
Step-by-step Guide to Creating Realistic Fangs with Chalk
Let’s sink our teeth into the details of crafting realistic fangs using Halloween face paint chalk. Begin by choosing a base color – perhaps a bone-white or sinister gray. With a thin piece of chalk, carefully outline the shape of the fangs on your cheeks. Make them as sharp or as curvy as you desire. Fill in the outlines with bold strokes, ensuring the fangs pop with intensity.
Next, add shading for that extra touch of realism. Use a darker shade of chalk to create shadows beneath the fangs, giving them depth and a 3D effect. Blend the colors seamlessly for a professional finish that leaves everyone wondering if your fangs are real.
Tips for Adding Depth and Dimension to Fang Designs
Elevate your fang game with these pro tips. First, consider using a touch of red chalk to simulate blood around the base of the fangs – it adds a gruesome touch without the mess. Experiment with shades of white and gray to achieve a natural, textured look. Remember, it’s all about creating an eerie and enchanting illusion.
Outline your fangs with a subtle black chalk line to make them stand out. This simple trick enhances the contrast and makes fangs pop against your skin. Play around with the angle and size of your fangs for a personalized touch that suits your Halloween persona.
Scary Face Painting for Halloween
Horror-inspired Face Paint Ideas with Chalk
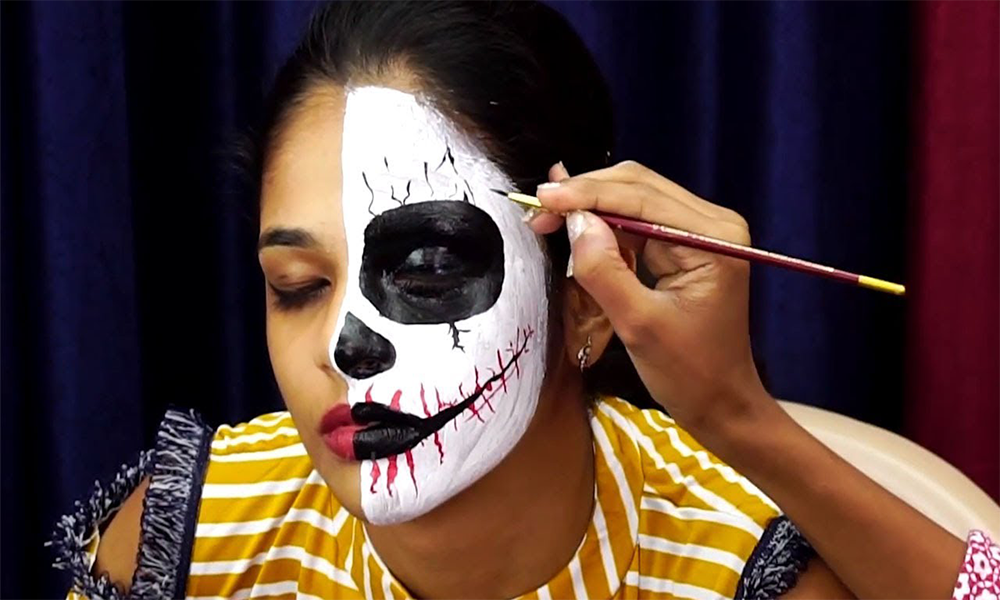
Let’s unleash the darkness with horror-inspired face paint chalk ideas to give you that spine-tingling edge. Start by choosing an eerie base color like deep black or ghostly gray. With a steady hand and a piece of chalk, sketch out the foundation of your terrifying creation. For a truly frightful effect, consider iconic horror symbols like skulls, ghosts, or even ominous eyes.
Now, it’s time to embrace the creepy textures. Use chalk to add gritty details, creating the illusion of decaying skin or haunting scars. Experiment with different shades to give your face paint a dynamic and unsettling appearance. Remember, the key is to go beyond the ordinary and into the realm of the truly terrifying.
Incorporating Elements Like Blood, Scars, and Creepy Textures
Take your horror face paint to the next level by incorporating chilling elements. Use red chalk sparingly to simulate dripping blood – a subtle touch that adds a gruesome twist. Introduce scars and scratches with precise chalk strokes, making them look like they’ve been etched into your skin. Play with contrasts by blending dark and light chalk shades, creating a macabre depth and leaving everyone in awe.
Consider adding unexpected elements like cracks or veins to enhance the horror vibe. These subtle details contribute to the eerie atmosphere, ensuring your face paint becomes a true work of art that captures the essence of Halloween fright.

The Art of Halloween Face Paint Chalk Costume
Painted Zombie Pumpkin
Transforming Into a Spooky, Painted Zombie Pumpkin
Embark on a thrilling journey of becoming a painted zombie pumpkin with just a few chalk strokes. Start by choosing a base color – a vivid orange that captures the essence of a classic pumpkin. Outline the pumpkin shape on your face with the ease of chalk, ensuring to leave space for those undead touches.
Now, let the zombie magic begin. Use gray and black chalk to add ghastly details. Create sunken, hollow eyes that scream the undead and give your pumpkin a zombie twist. Experiment with jagged lines for the mouth, adding a touch of decay to complete the spine-chilling effect. The result? A fusion of the playful pumpkin spirit and the eerie allure of the undead.
Blending Chalk Colors for a Vibrant Yet Eerie Effect
Achieve a vibrant yet eerie allure by mastering the art of blending chalk colors. Blend shades of orange to create dimension and depth on your pumpkin canvas. Transition seamlessly into the darker hues for the zombie elements, ensuring a harmonious integration of spooky and festive.
The painted zombie pumpkin is a unique and captivating costume idea in Halloween face paint chalk. You can unleash your artistic side with simple chalk strokes and become the ultimate Halloween masterpiece.
Horror Face Paint Ideas
Creating a Chilling and Terrifying Llook with Chalk
Step into the shadows and transform your face into a canvas of horror with the magic of chalk. Begin by choosing a dark base color – a sinister black or deep blood red. Outline the contours of your face, creating a macabre foundation for your terrifying masterpiece. Consider classic horror elements like haunted eyes, demonic symbols, or even a stitched-up mouth for an extra touch of fright.
Now, let the fear unfold. Use white chalk strategically to add highlights and accents, creating a stark contrast that enhances the horror effect. Experiment with shadowing techniques to give your face an otherworldly, spectral appearance. The goal is to send shivers down spines with every stroke of chalk.
Combining Various Techniques for a Professional Finish
Achieve a professional and spine-chilling finish by combining various techniques in your horror face paint. Blend colors seamlessly to create transitions between the dark and light shades, adding depth and realism to your terrifying look. Experiment with textures – from cracked skin to dripping blood – for an extra layer of horror that will leave onlookers in awe.
Consider incorporating unexpected elements like glowing eyes or ghostly glow to take it up a notch. With chalk as your artistic tool, the possibilities are endless. Remember, it’s not just about looking scary; it’s about embodying the essence of horror itself.

Tips for a Successful Halloween Face Paint Chalk Makeup
Ensuring Lasting and Comfort
Setting the chalk makeup for all-night wear
Setting your chalk makeup is crucial to ensure your masterpiece stays intact throughout the night. Consider using a translucent setting powder to dust over your face gently. This not only helps to fix the chalk in place but also prevents smudging and fading. The result? A long-lasting and vibrant Halloween face paint that withstands the test of time.
Remember to give your masterpiece a finishing touch with a makeup setting spray. A few spritzes will not only lock in the colors but also provide a protective barrier against the elements, ensuring your Halloween look stays flawless from dusk to dawn.
Addressing potential discomfort and skin-friendly removal
Comfort is key during your Halloween festivities. To address any potential discomfort caused by chalk makeup, apply a thin layer of moisturizer before starting your face painting adventure. This creates a barrier between your skin and the chalk, reducing the chance of irritation.
In the Halloween face paint chalk world, longevity and comfort go hand in hand. By following these tips, you not only guarantee a stunning look but also ensure a comfortable and skin-friendly experience throughout your Halloween celebration.
Ensuring Lasting and Comfort
Safe and Non-toxic Face Paint Chalk for Children
Choosing the right face paint for kids is crucial, and opting for non-toxic options ensures a safe and enjoyable experience. Look for face paint chalk labeled “non-toxic” and “safe for children.” These formulations are designed with sensitive skin in mind, giving parents peace of mind while allowing kids to unleash their creativity without worry.
Before applying, perform a patch test to ensure no allergic reactions. Once confirmed, let the Halloween face painting adventure begin with the assurance that the chosen chalk makeup is gentle and kid-friendly.
Engaging Kids with Creative Halloween Designs
Make Halloween an unforgettable experience for kids by engaging them in the creative process. Encourage little artists to choose their Halloween designs, whether it’s a friendly pumpkin, a cute ghost, or their favorite spooky character. Provide a variety of chalk colors, and let their imaginations run wild.
For added fun, consider using stencils or templates to help kids create intricate designs without the need for advanced artistic skills. With the right tools and creativity, kids can become Halloween face paint artists, showcasing their unique personalities and preferences.
Conclusion
Recap of the Versatility and Creativity Achievable with Halloween Face Paint Chalk
Throughout our exploration, we’ve uncovered the ease with which chalk allows you to embody classic Halloween symbols, create chilling horror masterpieces, and even transform kids into adorable creatures of the night – all while ensuring safety and non-toxic enjoyment.
The vibrant and dynamic colors of chalk and its user-friendly application empower both beginners and seasoned artists to unleash their imaginations and bring their Halloween visions to life. The simplicity of chalk allows for quick and impressive designs, making it an ideal choice for last-minute costume emergencies.
Related FAQ
How to paint a cat face for halloween?
Painting a cat face for Halloween is a perfect choice! Here's a step-by-step guide to achieve that feline magic:
- Base Color: Start by applying a base color, usually white or a light beige, to your face using face paint chalk. This creates a clean canvas for the cat features.
- Eye Details: Outline and fill in your eyes using dark colors like black or brown. Extend the lines outward to create a cat-eye shape, adding a touch of mystery. You can also enhance the eyes with a pop of color for a playful twist.
- Nose: Paint a small, triangular nose in the center of your face. You can choose black or a coordinating color to match your cat theme.
- Whiskers: Extend whiskers outward from the sides of your nose using a thin brush or chalk stick. You can create three to four whiskers on each side for an authentic cat look.
- Mouth Details: Enhance the mouth area by adding a subtle curve or small lines to represent the cat's mouth. Feel free to add a touch of color to the lips for added flair.
- Ears: Paint cat ears on the top of your forehead. Depending on your artistic preference, these can be simple triangles filled with color or more elaborate.
How to paint face for halloween?
Painting your face for Halloween is a fantastic way to transform into your chosen character. Here's a simple guide to help you get started:
- Gather Supplies: Collect face paint chalk, brushes, sponges, and a mirror. Ensure you have a clean face to start.
- Choose a Design: Decide on the Halloween character or theme you want to portray. Whether it's a spooky ghoul, a whimsical fairy, or a classic pumpkin, having a plan will make the process smoother.
- Apply Base Color: Use a sponge to apply a base color to your face. This can be a pale white, ghostly green, or any color that suits your character.
- Add Details: Use smaller brushes to add details like eyes, nose, mouth, and any additional features required for your chosen design. Remember to blend colors seamlessly for a professional look.
- Accessorize: Use accessories like glitter, rhinestones, or temporary tattoos to enhance your face paint. These additions can add a touch of magic to your Halloween look.
- Set with Powder: Once satisfied with your design, set the face paint with a translucent setting powder. This helps prevent smudging and ensures longevity throughout your Halloween festivities.
How to paint your face for halloween?
Painting your face for Halloween is a delightful way to express your creativity. Here's a comprehensive guide to help you achieve a stunning and memorable look:
- Prep Your Skin: Start with clean, moisturized skin. This provides a smooth canvas for the face paint. If you have sensitive skin, apply a thin layer of moisturizer to act as a barrier.
- Gather Supplies: Collect face paint chalk in various colors, brushes, sponges, and a mirror. Have a reference image or idea of your desired Halloween look.
- Choose a Base Color: Using a sponge, apply a base color to your face. This could be the color of your character's skin or a base that complements the overall theme.
- Outline Features: Use smaller brushes to outline and define features like eyes, nose, and mouth. Pay attention to the details that make your Halloween character unique.
- Add Colors and Details: Start layering colors and adding details to bring your character to life. Whether it's scars, wrinkles, or fantasy elements, this is where your creativity shines.
- Blend and Shade: Blend colors seamlessly to avoid harsh lines. Add shading and highlights to create dimension and make your face paint look more realistic.
- Accessorize: Consider adding accessories like false lashes, gems, or glitter to enhance your look. These extra touches can elevate your Halloween face paint to the next level.
- Set with Powder: After completing your masterpiece, set the face paint with a translucent setting powder. This helps prevent smudging and ensures your Halloween creation lasts throughout the night.
When does the halloween face paint come out?
The availability of Halloween face paint varies depending on where you're looking to get it. Here are a few common scenarios:
- Retail Stores: Physical stores, especially those specializing in costumes and makeup, typically start stocking Halloween face paint in the weeks leading up to October. It's advisable to check with local stores or visit their websites to find out when they start carrying Halloween-themed makeup.
- Online Retailers: Many online retailers offer Halloween face paint options year-round. However, they often highlight and promote specific Halloween collections closer to the spooky season. Watch their websites, newsletters, or social media announcements for the latest releases.
How do I choose the right colors for my halloween face paint chalk look?
Selecting the perfect colors is crucial for a standout Halloween face paint. Consider your character or theme – traditional Halloween colors like orange, black, and white work well, but don't hesitate to add unexpected pops of color for a unique twist. Experiment with contrasting shades to create depth and make your features pop.
Can I mix different chalk colors to create custom shades?
Absolutely! Mixing chalk colors is an excellent way to achieve custom shades tailored to your Halloween look. Use a clean palette or the back of your hand to blend colors seamlessly. This allows you to expand your color options and add personalized touches to your face paint masterpiece.
Related Products
Share this post and explore with us!


