How to paint your face for halloween?
Table of Contents
Introduction to Halloween Face Paint
The Popularity of Halloween Face Painting
Halloween face painting has become a popular way to celebrate the spooky season. Whether you’re transforming into a terrifying monster or a whimsical fairy, face painting offers endless possibilities. Many people choose Halloween face paint because it’s an easy and fun way to complete a costume without the need for masks or elaborate props.
Face painting for Halloween isn’t just for kids—adults love it too! From Halloween parties to trick-or-treating, Halloween face paint brings creativity and excitement to the festivities. It’s also a hit on social media, with countless tutorials and inspiration posts from artists around the world. The versatility and accessibility of face painting make it a go-to choice for anyone looking to stand out on Halloween night.
Benefits of Face Painting for Halloween
Using face paint for Halloween has several benefits. Firstly, it allows for a wide range of designs that can be customized to suit any costume idea. Whether you want to be a scary zombie or a magical unicorn, Halloween face paint can bring your vision to life. It’s also a great way to express creativity and showcase artistic skills.
Another benefit is the comfort factor. Unlike masks, which can be hot and restrictive, Halloween face paint is lightweight and breathable. This makes it ideal for long nights of Halloween parties or trick-or-treating with kids. Plus, face paint can be easily applied and removed, making it a convenient option for last-minute costume changes.
Lastly, face painting is a fun activity for all ages. It can be a great bonding experience for families as they paint each other’s faces and prepare for Halloween festivities. Kids, in particular, love the transformation process and the chance to become their favorite characters. With Halloween face paint, the possibilities are truly endless, making it a perfect addition to any Halloween celebration.

Choosing Your Halloween Face Paint Design
Popular Halloween Face Paint Ideas
When it comes to Halloween face paint, the options are endless. You can go with classic designs, pop culture inspirations, animal designs, or fantasy and mythical creatures. Each category offers unique and exciting possibilities for creating the perfect Halloween look.
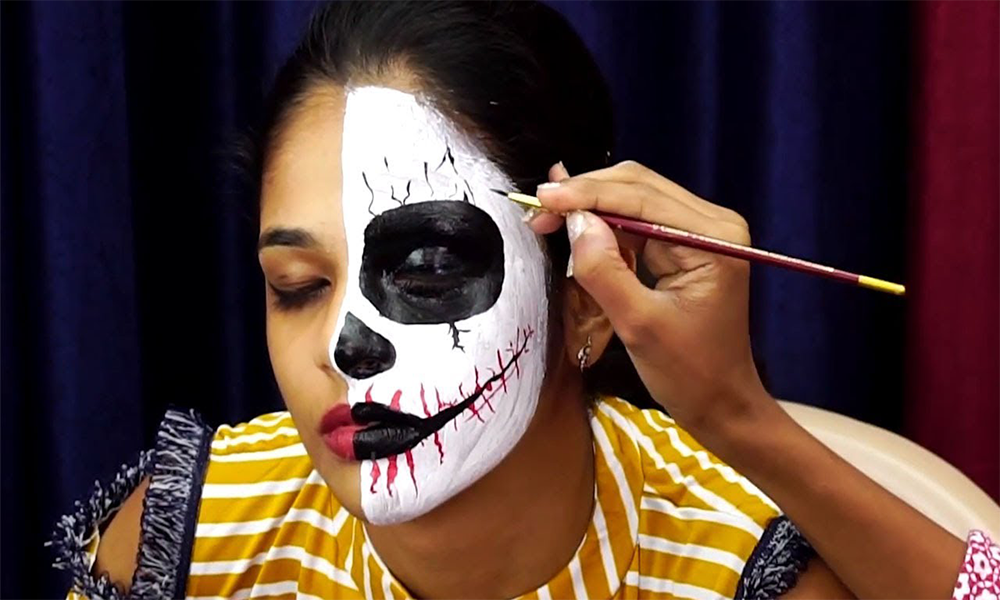
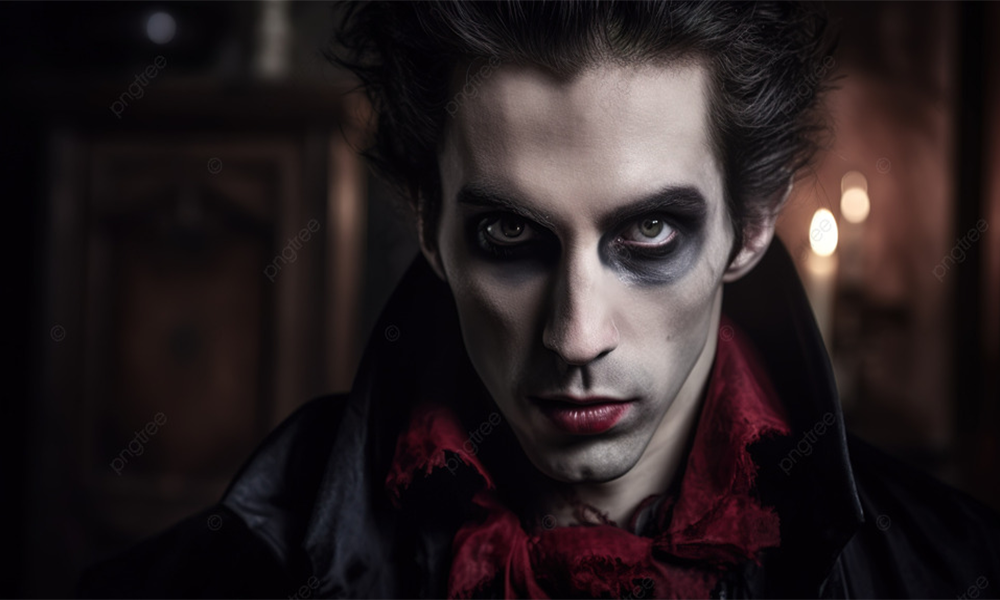
Classic Designs (e.g., Skeletons, Vampires, Witches)
Classic Halloween face paint designs are always a hit. Skeletons, with their black-and-white patterns, can be both spooky and stylish. Vampires, with their pale faces, dark eyes, and blood-red lips, are another favorite. Witches with green skin and warts always stay in style. These designs are easy to recognize and perfect for capturing the Halloween spirit.
Pop Culture Inspirations (e.g., Movie Characters, Superheroes)
Pop culture provides endless inspiration for Halloween face paint. From iconic movie characters to beloved superheroes, these designs are always popular. Think about transforming into your favorite character from a recent blockbuster or classic film. Superheroes like Spider-Man or Wonder Woman are also great choices. Pop culture designs are fun and instantly recognizable, making them perfect for parties and social media.
Animal Designs (e.g., Cats, Tigers, Spiders)
Animal designs are another fun option for Halloween face paint. Cats, with their whiskers and cute noses, are a classic choice. Tigers, with their bold stripes and fierce looks, can be both scary and impressive. Spiders, with their creepy crawly details, are perfect for adding a touch of spookiness. Animal designs are versatile and can be as simple or as detailed as you like.
Fantasy and Mythical Creatures (e.g., Fairies, Dragons, Zombies)
For a more magical Halloween face paint design, consider fantasy and mythical creatures. Fairies, with their glittery accents and delicate details, can be enchanting. Dragons, with their scales and fierce expressions, are great for a dramatic look. Zombies, with their undead features and gruesome details, are perfect for a truly terrifying appearance. These designs let your imagination run wild and are sure to impress.
Summary
In conclusion, when choosing your Halloween face paint design, think about what excites you and fits your costume idea. Whether you go for a classic design, a pop culture icon, an animal, or a mythical creature, Halloween face paint allows you to express your creativity and make a statement.
Essential Tools and Materials
Types of Face Paint (Water-based, Grease-based, Alcohol-based)
Choosing the right type of Halloween face paint is crucial for a great look. There are three main types to consider: water-based, grease-based, and alcohol-based.
Water-based face paints are the most common and are easy to apply and remove. They dry quickly and are perfect for detailed designs. Grease-based face paints are thicker and more durable, ideal for long-lasting wear. They require setting powder to stay in place and can be a bit harder to remove. Alcohol-based face paints are the most durable and water-resistant. They are great for creating intricate designs and special effects that need to last all night, even through sweat or rain.
Brushes and Sponges
The right tools can make a big difference in your Halloween face paint application. Brushes and sponges are essential for creating different effects and details.
Brushes come in various sizes and shapes, perfect for fine lines and intricate details. Use smaller brushes for delicate work like outlines and larger ones for filling in color. Sponges are great for applying base colors and blending. They help create smooth, even coverage and can also be used to create texture effects. Having a variety of brushes and sponges in your toolkit will help you achieve the perfect look.
Templates and Stickers
Stencils and stickers can be a game-changer for Halloween face paint, especially if you need more confidence in your freehand skills.
Stencils help create precise shapes and patterns with ease. They are perfect for designs like stars, spider webs, or other detailed elements. Place the stencil on the skin, apply the paint, and remove it to reveal a clean, professional-looking design. Stickers can add an extra layer of detail and sparkle. Use them to accent your face paint with gems, glitter shapes, or other decorative elements. Both stencils and stickers can save time and elevate your face paint.
Additional Supplies (Glitter, Gems, Prosthetics)
To make your Halloween face paint truly stand out, consider adding extra supplies like glitter, gems, and prosthetics.
Glitter adds a magical touch to any design, perfect for fairies, unicorns, or any look that needs a bit of sparkle. Gems can be used to create stunning accents, adding depth and dimension to your face paint. Prosthetics, such as fake wounds, scars, or special effects pieces, can take your Halloween face paint to the next level. These additional supplies can help you create a unique and memorable look that will impress everyone.
Summary
In summary, having the right tools and materials is key to successful Halloween face paint. By choosing the right type of paint, using the appropriate brushes and sponges, and incorporating stencils, stickers, and additional supplies, you can create amazing and detailed designs that will make your Halloween unforgettable.
Preparing Your Skin for Face Painting
Cleansing and Moisturizing
Before you start with Halloween face paint, it’s essential to prepare your skin. Cleanse your face to remove dirt, oil, or makeup. Use a gentle cleanser that suits your skin type. This will help the face paint adhere better and look smoother.
After cleansing, moisturize. A light, non-greasy moisturizer will keep your skin hydrated without making it oily. Moisturizing is crucial because face paint can be drying, and hydrated skin will hold the paint better. Plus, it makes the application process smoother and helps prevent cracking.
Using a Primer for Longer-lasting Results
To make your Halloween face paint last all night, use a primer. A good primer creates a smooth base and helps the paint stay in place. Apply a thin layer of primer after moisturizing and let it dry completely before you start painting.
Primers can also help to even out your skin tone and fill in any fine lines or pores. This makes the face paint look more professional and ensures it stays put through all the Halloween festivities. For the best results, choose a primer that is designed for use with face paint or makeup.
Protecting Sensitive Areas
When applying Halloween face paint, it’s important to protect sensitive areas of your skin. Areas like the eyes, lips, and around the nose can be more delicate and prone to irritation.
For the eye area, use face paint products that are safe for use near the eyes. Avoid using paint too close to the waterline. If you’re painting your lips, consider using lip-safe products that won’t cause dryness or irritation. When painting around the nose, be gentle and avoid inhaling any paint particles.
You can also use a barrier cream on sensitive areas to provide an extra layer of protection. This is especially helpful for people with sensitive skin or allergies. Taking these precautions will help ensure that your Halloween face paint is not only stunning but also safe and comfortable.
Summary
In conclusion, preparing your skin properly is the first step to achieving a flawless Halloween face paint look. By cleansing and moisturizing, using a primer, and protecting sensitive areas, you can ensure that your face paint looks great and lasts all night.
Step-by-Step Guide to Painting Your Face
Basic Techniques
The first step in creating a stunning Halloween face paint look is applying the base colors. Start with a clean, primed face. Choose a base color that matches your design, whether it’s white for a skeleton or green for a witch. Once your base color is set, it’s time to add depth and dimension by layering and blending additional colors. This technique will make your Halloween face paint look more professional and striking.
Applying Base Colors
Use a damp sponge or a wide brush to apply the base color evenly across your face. Dab the paint gently onto your skin, avoiding dragging, which can cause streaks. Make sure to cover all areas, including around the eyes and lips, but be careful not to get paint in your eyes or mouth. Let the base color dry completely before moving on to the next step. This will create a smooth canvas for the rest of your design.
Layering and Blending Colors
Start by adding the darkest shades first. Use a smaller brush for precision and apply the darker colors to the areas where you want to create shadows and depth, such as the hollows of the cheeks, around the eyes, or under the cheekbones. Then, use a clean brush or sponge to blend these colors into the base color, using gentle, circular motions to soften the edges and create a gradient effect.
Next, add mid-tones to bridge the base color and the shadows. Apply these colors next to the darker areas and blend them outwards. This step will help to smooth the transition between the dark and light areas.
Finally, highlight the design with the lightest colors. Apply these to the high points of your face, such as the tops of the cheekbones, the bridge of the nose, and the brow bones. Use a small brush for precision and blend carefully to ensure a natural look.
Summary
In conclusion, mastering basic techniques like applying base colors and layering and blending can elevate your Halloween face paint. These steps are key to creating a look that is both striking and seamless. With practice, you can develop the skills to create professional-quality face paint designs that will impress everyone at your Halloween celebration.
Post-chalk Hair Care Tips
To make your Halloween face paint stand out, focus on adding details and highlights. These finishing touches bring your design to life and add a professional touch. Creating shadows and depth is crucial for a dramatic and striking Halloween face paint design. Shadows give your design dimension and make it more visually interesting.
Adding Details and Highlights
Start by using a fine-tipped brush to add small details. This could be the lines on a spider web, the cracks on a skull, or the intricate designs on a fairy’s wings. Take your time with these details; they can make a big difference in the overall look. Use a steady hand and work slowly to ensure precision.
Next, add highlights to make certain areas pop. Choose a lighter color than your base and apply it to places that would naturally catch light, such as the tops of your cheekbones, the bridge of your nose, and the center of your forehead. You can also use white or metallic paint for extra brightness. Adding highlights can create a three-dimensional effect, making your Halloween face paint look more realistic and dynamic.
Creating Shadows and Depth
To create shadows, use a darker shade of your base color or a complementary dark color. Apply this color to areas that would naturally be in shadow, such as under your cheekbones, around your eyes, and along the sides of your nose. Use a small brush for precision and blend the edges to avoid harsh lines.
For deeper shadows, layer multiple dark colors. Start with a medium-dark shade and blend it out, then add a darker shade closer to the area of deepest shadow. This layering technique will create a gradient effect, adding depth and realism to your Halloween face paint.
Summary
In summary, advanced techniques like adding details and highlights and creating shadows and depth can take your Halloween face paint to the next level. By focusing on these elements, you can make a look that is both impressive and realistic, ensuring you stand out at any Halloween event.

Using Stencils and Stickers for Easy Designs
Stencils and stickers are fantastic tools for creating quick and impressive Halloween face paint designs. Whether you’re a beginner or an experienced artist, these tools can help you achieve intricate looks with minimal effort.
Stencils
Stencils are templates that you place on your skin and then apply face paint over. They come in various shapes and patterns, such as stars, hearts, or even intricate lace designs. Using stencils with Halloween face paint is straightforward:
First, choose a stencil that matches your desired design. Secure it gently against your skin. Next, apply face paint over the stencil using a sponge or brush, making sure to cover the stencil completely. Once applied, carefully remove the stencil to reveal a crisp and detailed design.
Stencils are perfect for creating symmetrical patterns or adding detailed elements like scales or intricate webs. They’re also great for beginners who may need more steady hands for freehand designs.
Stickers
Stickers are another easy option for enhancing your Halloween face paint. They come in various shapes and styles, such as gemstones, glitter shapes, or themed designs like pumpkins or bats.
To use stickers, peel them off their backing and gently press them onto your dry face paint. They instantly add sparkle, texture, or thematic elements to your look without the need for additional painting skills. Stickers are especially popular with kids and can make face painting sessions quick and enjoyable.
Combining
For more creative freedom, you can combine stencils and stickers in your Halloween face paint designs. Use stencils for intricate patterns or base colors, then embellish with stickers for added flair. This combination allows you to create complex looks with ease, whether you’re aiming for a spooky skull design or a glamorous fairy look.
Summary
In conclusion, using stencils and stickers with Halloween face paint is a fun and practical way to achieve stunning designs. They offer versatility and ease of use, making them suitable for both beginners and seasoned face painters alike. Incorporating these tools into your face painting repertoire can elevate your Halloween costume and make you the highlight of any spooky gathering.
Tips and Tricks for a Perfect Halloween Face Paint
Avoiding Common Mistakes
Achieving a flawless Halloween face paint look requires avoiding some common pitfalls. Here are a few tips to keep in mind:
- Prep Your Skin: Clean and moisturize your face before applying Halloween face paint to ensure smooth application and prevent clogged pores.
- Use the Right Tools: Quality brushes and sponges make a difference in achieving precise lines and smooth blends.
- Layer Wisely: Start with thin layers of paint and build up as needed to avoid a cakey or streaky appearance.
- Avoid Oily Products: Choose water-based face paints to prevent smudging and ensure longevity.
- Practice Makes Perfect: Experiment with designs and techniques before the big night to refine your skills.
Making Your Face Paint Last All Night
To ensure your Halloween face paint stays vibrant and intact throughout the festivities:
- Prime Your Skin: Use a face primer before applying face paint to create a smooth base and help the paint adhere better.
- Set with Powder: After applying face paint, set it with translucent powder to reduce shine and enhance durability.
- Avoid Touching: Resist the urge to touch your face as it can smudge the paint. If necessary, use a setting spray to seal the paint.
- Stay Dry: Minimize exposure to moisture and sweat by staying indoors or using sweat-resistant face paint.
Safe Removal of Face Paint
After the Halloween fun, it’s essential to remove face paint properly to avoid skin irritation:
- Use Gentle Cleansers: Choose a mild cleanser suitable for your skin type to remove face paint without scrubbing gently.
- Moisturize Thoroughly: After cleansing, moisturize your skin to replenish hydration lost during removal.
- Avoid Harsh Chemicals: Avoid alcohol-based removers or harsh wipes that can dry out or irritate your skin.
- Be Patient: Take your time to ensure all traces of face paint are completely removed, especially around delicate areas like the eyes.
Keeping Face Paint from Smudging
To prevent your Halloween face paint from smudging during wear:
- Set with Powder: Dust translucent powder over your face paint to absorb excess moisture and oil and help keep it in place.
- Use Setting Spray: Finish your look with a spritz of setting spray to lock in the face paint and prevent transfer.
- Avoid Touching: Refrain from touching your face unnecessarily to minimize the risk of smudging.
- Stay Dry: If possible, avoid activities that may cause sweating or exposure to water, as this can compromise the longevity of your face paint.
Summary
In summary, by following these tips and tricks, you can achieve a flawless and long-lasting Halloween face paint look while ensuring safe application and removal. Practice these techniques beforehand to perfect your skills and enjoy a memorable Halloween celebration with confidence.

Face Painting for Kids vs. Adults
Kid-friendly Designs and Techniques
When it comes to Halloween face paint, designing for kids requires a different approach compared to adults. Here are some tips for creating kid-friendly designs:
- Simple and Playful: Opt for designs that are easy to recognize and fun for kids, such as animals, superheroes, or cartoon characters.
- Bright Colors: Use vibrant and non-toxic face paints that are safe for children’s sensitive skin. Avoid using products that contain allergens or harsh chemicals.
- Quick Application: Kids may not sit still for long periods, so choose designs that can be painted quickly with basic techniques like sponges or simple brushes.
- Stencils and Stickers: Utilize stencils and stickers to add detail and make the process more enjoyable for kids. These tools help create intricate designs without requiring advanced painting skills.
Ensuring Safety for Children's Skin
Safety is paramount when face painting for kids, especially during Halloween festivities:
- Choose Safe Products: Use hypoallergenic and FDA-approved face paints specifically formulated for children. Avoid using paints that contain ingredients known to cause skin reactions.
- Test Before Use: Before applying face paint to the entire face, perform a patch test on a small area of the child’s skin to check for allergic reactions.
- Avoid Eyes and Lips: To prevent irritation or ingestion, keep face paint away from sensitive areas like the eyes and mouth. Instead, use face-safe stickers or makeup around these areas.
- Remove Promptly: Ensure face paint is removed promptly after the event using gentle cleansers and moisturizers suitable for children’s skin.
Age-appropriate Themes
When choosing themes for kids’ Halloween face paint, consider age-appropriate designs that match their interests and comfort levels:
- Young Children: Stick to cute and friendly designs like butterflies, dinosaurs, or pirates. These themes are colorful and appealing without being too frightening.
- Older Children: For older kids, consider more adventurous designs, such as zombies, witches, or vampires, tailored to their preferences and maturity level.
- Consent and Comfort: Always respect a child’s preferences and comfort level when selecting a face paint design. Ensure they are excited about their chosen theme to enhance their Halloween experience.
Summary
In summary, face painting for kids during Halloween involves creating playful and safe designs that cater to their age and preferences. By using kid-friendly techniques, ensuring safety measures, and selecting age-appropriate themes, you can create memorable and enjoyable Halloween face paint experiences for children.
Halloween Face Paint Safety Tips
Choosing Safe and Non-toxic Products
When preparing for Halloween face paint, it’s crucial to prioritize safety by selecting products that are safe and non-toxic:
- Look for Quality Brands: Choose face paints that are specifically labeled as safe for use on the face and compliant with FDA regulations. These paints are formulated to be gentle on the skin and free from harmful ingredients.
- Avoid Cheap Alternatives: Steer clear of cheap or unbranded face paints, as they may contain allergens or harsh chemicals that can cause skin reactions.
- Water-based Options: Opt for water-based face paints whenever possible. These paints are easier to apply and remove compared to oil-based alternatives. They are also less likely to clog pores or cause skin irritation.
Patch Testing New Products
Before applying Halloween face paint to your entire face, it’s essential to conduct a patch test:
- Test on a Small Area: Apply a small amount of face paint to a discreet area of your skin, such as the inside of your wrist or elbow.
- Wait and Observe: Allow the paint to dry completely, and then wait at least 30 minutes to an hour. Monitor the test area for any signs of redness, itching, or irritation.
- Check for Allergic Reactions: If you experience any adverse reactions during the patch test, refrain from using the product on your face. Consider trying a different brand or formulation that is hypoallergenic and suitable for sensitive skin.
Avoiding Allergic Reactions
To minimize the risk of allergic reactions when using Halloween face paint, follow these preventive measures:
- Know Your Ingredients: Familiarize yourself with common allergens found in face paint, such as parabens, fragrances, and certain dyes. Choose products that are labeled as hypoallergenic and free from these ingredients.
- Monitor Skin Sensitivity: Be mindful of any pre-existing skin conditions or allergies that may react to face paint ingredients. If you have sensitive skin, consult with a dermatologist before applying face paint.
- Remove Promptly: Remove face paint promptly after your Halloween festivities using gentle cleansers and moisturizers. Leaving face paint on for extended periods can increase the risk of skin irritation or breakouts.
Summary
In summary, ensuring Halloween face paint safety involves choosing safe and non-toxic products, conducting patch tests to prevent allergic reactions, and being proactive about skin sensitivity. By following these tips, you can enjoy a fun and spooky Halloween with vibrant and safe face paint designs.
Inspiring Halloween Face Paint Ideas from Social Media
Following Influencers and Artists
Social media platforms like Instagram and TikTok offer a wealth of inspiration for Halloween face paint enthusiasts:
- Explore Diverse Styles: Follow popular influencers and artists who specialize in Halloween face paint. They often share creative designs and step-by-step tutorials that can spark your creativity.
- Engage with Communities: Join online communities and groups dedicated to face painting. Participate in discussions, share your work, and learn from others’ experiences to expand your knowledge and skills.
Popular Hashtags to Explore
Discover trending Halloween face paint ideas by exploring popular hashtags:
- #HalloweenFacePaint: This hashtag is a go-to for discovering a wide range of Halloween-themed face paint designs, from spooky to whimsical.
- #FacePaintIdeas: Explore this hashtag for innovative face paint concepts and tutorials shared by artists and enthusiasts.
- #HalloweenMakeup: While broader, this hashtag includes creative makeup looks that often incorporate face painting techniques, providing a wider spectrum of ideas.
Top Accounts to Follow for Inspiration
For consistent inspiration and ideas, consider following these top accounts known for their Halloween face paint creativity:
- @FacePaintingGuru: This account is a must-follow for Halloween enthusiasts. It is known for detailed tutorials and innovative techniques in face painting.
- @SpookyFaceArt: Specializing in spooky and haunting Halloween face paint designs, this account showcases intricate and dramatic looks.
- @HalloweenMakeup: Inspo curates a variety of Halloween makeup and face paint ideas featuring amateur and professional artists for diverse inspiration.
Summary
Engaging with influencers, exploring trending hashtags, and following top social media accounts can provide endless inspiration for your Halloween face paint creations. Whether you’re aiming for a frightening zombie look or a magical fairy design, these platforms offer a community of creativity to explore and learn from.
Conclusion
Recap of Key Points
Throughout this guide on Halloween face paint, we’ve explored various techniques and tips to help you create stunning and safe designs. From choosing the right products to mastering advanced techniques, each step is aimed at enhancing your Halloween face paint experience.
Encouragement to Experiment and Have Fun
As you prepare for Halloween festivities, don’t hesitate to experiment with different designs and styles of face paint. Whether you’re aiming for spooky skeletons, magical creatures, or favorite movie characters, Halloween face paint allows you to unleash your creativity and transform into anything you desire.
In conclusion, Halloween face paint is not just about transforming your appearance; it’s about expressing your imagination and joining in the fun of this exciting holiday. Remember to prioritize safety, enjoy the process, and let your creativity shine through your Halloween face paint creations. Happy painting!
Related FAQ
What materials do I need for Halloween face painting?
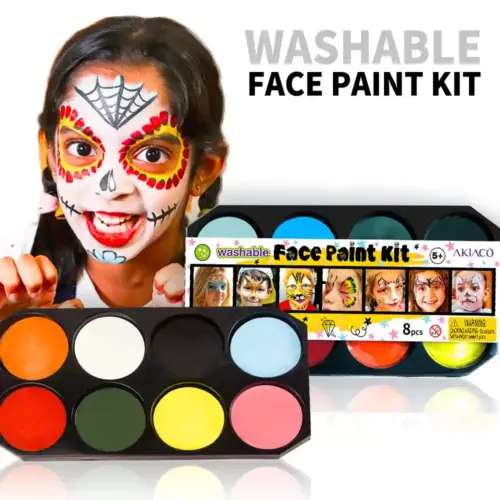
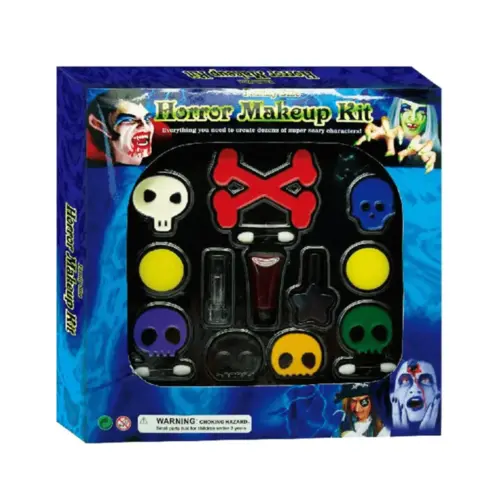
To paint your face for Halloween, you'll need several essential materials:
- Face Paint: Choose water-based or grease-based face paints that are safe for the skin and provide vibrant colors.
- Brushes and Sponges: Use brushes of different sizes for details and sponges for blending and larger areas.
- Stencils and Stickers: These are optional but helpful for creating intricate designs quickly.
- Glitter, Gems, and Prosthetics: Additional supplies for adding sparkle and special effects to your design.
How do I prepare my skin before applying face paint?
Preparing your skin is crucial for a flawless finish:
- Cleanse: Wash your face with a gentle cleanser to remove any dirt and oil.
- Moisturize: Apply a light moisturizer to hydrate your skin and create a smooth base for the face paint.
- Primer (Optional): Use a face primer to help the face paint adhere better and last longer.
What are some popular Halloween face paint designs?
There are endless possibilities for Halloween face paint designs:
- Classic Characters: Such as witches, vampires, zombies, and skeletons.
- Pop Culture Icons: Movie characters, superheroes, or villains.
- Animals: Cats, tigers, butterflies, etc.
- Fantasy Creatures: Fairies, dragons, mermaids, and mythical beings.
How does hair chalk differ from traditional hair dye?
Follow these tips to ensure your Halloween face paint stays put throughout the night:
- Use a primer: Apply a face primer before painting to create a smooth base and help the paint adhere better.
- Set with Powder: After applying face paint, set it with translucent powder to reduce shine and prevent smudging.
- Avoid Touching: Try not to touch your face unnecessarily to minimize rubbing off the paint.
- Use Setting Spray: Finish with a setting spray to seal the face paint and make it more durable.
How do I remove Halloween face paint properly?
Removing Halloween face paint is important to prevent skin irritation:
- Gentle Cleanser: Use a gentle cleanser or baby shampoo with lukewarm water to wash off the face paint.
- Moisturize: After cleansing, apply a moisturizer to replenish hydration.
- Avoid Harsh Products: Steer clear of alcohol-based removers that can dry out your skin.
How can I avoid allergic reactions to Halloween face paint?
To minimize the risk of allergic reactions:
- Patch Test: Perform a patch test on a small area of your skin at least 24 hours before applying the face paint.
- Choose Safe Products: Use hypoallergenic and FDA-compliant face paints designed for use on the face.
- Remove Promptly: Remove face paint promptly after your Halloween event to prevent prolonged exposure.
Related Products
Share this post and explore with us!


